TPM 2.0 Module, for ASUS, GIGABYTE, MSI and SUPERMICRO - Windows 11 Ready For Sale

When you click on links to various merchants on this site and make a purchase, this can result in this site earning a commission. Affiliate programs and affiliations include, but are not limited to, the eBay Partner Network.

TPM 2.0 Module, for ASUS, GIGABYTE, MSI and SUPERMICRO - Windows 11 Ready:
$39.99
1. Introduction
This a discrete TPM 2.0 module for desktop PC motherboards. It has an ultra-compact horizontal form, so it won’t clash with other components (e.g. your video card), or cables. It was originally engineered and manufacturered for industrial field applications, with excellent reliability.
Generally, discrete TPM module solutions are more reliable than fTPM solutions. Also, they can help you avoid some weird problems people have experienced with fTPM, such as:
- Encryption Key data get wiped out during BIOS updating.
- Credential info lost or invalidated after CPU upgraded or replaced (even happens when replacing old CPU with a same model one).
- Random CPU stuttering or performance issues, especially on Windows 11 and Ryzen 5000 series CPU.
If your need more detailed technical information (about IC, Firmware, etc.), please refer to Appendix A.
We know that some modules on market use refurbished controller ICs. Ours don't.
- Our products are true industrial application grade modules. They use brand new controller ICs form Infineon, and of course come with latest versioned firmware.
- Our products are designed and manufactured to archive as much reliability as possible. You can see lots of snake-winded and arc tracks on theirs PCBs. That means they utilize 4+ layered PCB, having complete signal reference plane, and signal tracks are strictly length tuned and impendance matched.
2. Choose Suitable SKU
If you know manufacturer of your motherboard, and the type of TPM connector interface on it, then just choose corresponding SKU.
If you don't exactly know the type of TPM connector interface, you can refer to Appendix B, which contains detailed information to help you choose corresponding SKU.
NOTE: ASUS, GIGABYTE and SUPERMICRO use exactly same LPC 20-Pin interace. If you are looking for LPC 20-Pin type for ASUS or GIGABYTE motherboard, just choose LPC 20-Pin for SUPERMICRO.
3. Installation
You can easily install the moudle by your self with only a few steps.
- Power off your PC, then plug TPM module into your motherboard.
- Power on PC, enter BIOS, and enable TPM 2.0 options.
- Reboot into Windows, and Windows will do the rest work for you. Windows performs then initialization and configuration works in the background silently, and you don't need to do anything.
- If you'd like, you can inspect TPM module info and status in Device Manager, or TPM Management.
If your need more detailed instructions, please refer to Appendix C.
4. Tech Support
If you are not sure about whether your motherboard can support TPM 2.0 module, or which SKU to use, or have any other technical questions, please send us an message. We will response ASAP (usually within 24 hours), and try our best to help you out.
5. Refunding
If you can't get your TPM 2.0 module work on your MB for any reason (like BIOS glitches, purchased wrong interface type, etc.), and you didn't damage it, you can return it and get refunded. But please understand that in this case, you are responsible for shipping cost.
Appendix A. Technical Information
SKU
Technical Data
LPC 20-Pin
for SUPERMICRO
Controller IC
Infineon SLB9665 XQ20
Firmware Version
5.63
Dimensions (W × L × H)
10mm × 25.5mm × 10.5mm
(0.39in × 1.00in × 0.41in)
Operating Temperature Range
-40°C ~ +85°C
(-40°F ~ +185°F)
Power Consumption (Typical)
8.25mW (Active Mode)
0.50mW (Sleep Mode)
LPC 12-Pin
for GIGABYTE
Controller IC
Infineon SLB9665 XQ20
Firmware Version
5.63
Dimensions (W × L × H)
10mm × 14.5mm × 6.5mm
(0.39in × 0.57in × 0.26in)
Operating Temperature Range
-40°C ~ +85°C
(-40°F ~ +185°F)
Power Consumption (Typical)
8.25mW (Active Mode)
0.50mW (Sleep Mode)
LPC 14-Pin
for MSI
Controller IC
Infineon SLB9665 XQ20
Firmware Version
5.63
Dimensions (W × L × H)
10mm × 16.5mm × 6.5mm
(0.39in × 0.65in × 0.26in)
Operating Temperature Range
-40°C ~ +85°C
(-40°F ~ +185°F)
Power Consumption (Typical)
8.25mW (Active Mode)
0.50mW (Sleep Mode)
SPI 12-Pin
for MSI
Controller IC
Infineon SLB9670 VQ20
Firmware Version
7.85
Dimensions (W × L × H)
10mm × 14.5mm × 6.5mm
(0.39in × 0.57in × 0.26in)
Operating Temperature Range
-20°C ~ +85°C
(-4°F ~ +185°F)
Power Consumption (Typical)
8.25mW (Active Mode)
0.36mW (Sleep Mode)
Appendix B. Determine SKU
You can determine which SKU you need from following table.
Find your motherboard brand in first column. From second column, check which pin layout of TPM connector is used on your motherboard. Then, in the third column is corresponding Connector Layout
(Top View)
Corresponding SKU & Notes
SUPERMICRO
LPC 20-Pin
SKU: LPC 20-Pin for SUPERMICRO
This SKU is also for ASUS and GIGABYTE LPC 20-Pin interface.
ASUS, GIGABYTE and SUPERMICRO use exactly same LPC 20-Pin interface.
ASUS
LPC 20-Pin
SKU: LPC 20-Pin for SUPERMICRO
ASUS, GIGABYTE and SUPERMICRO use exactly same LPC 20-Pin interface.
LPC 14-Pin
Currently out of stock. Will be restocked shortly.
SPI 14-Pin
Currently out of stock. Will be restocked shortly.
GIGABYTE
LPC 20-Pin
SKU: LPC 20-Pin for SUPERMICRO
ASUS, GIGABYTE and SUPERMICRO use exactly same LPC 20-Pin interface.
LPC 12-Pin
SKU: LPC 12-Pin for GIGABYTE
SPI 12-Pin
Currently out of stock. Will be restocked shortly.
MSI
LPC 14-Pin
SKU: LPC 14-Pin for MSI
SPI 12-Pin
SKU: SPI 12-Pin for MSI
Appendix C. Installing TPM Module
C.1. Physical Mounting
Once you receive your TPM 2.0 module, you will notice there is a white triangle mark on its PCB edge, indicating the “key” position of connector.
Also, you can see the corresponding pin hole is blocked, to prevent from pluging in wrong direction.
Find TPM connector on your motherboard, usually designated as “JTPM1”, “TPM1” or just “TPM”. Align the white triangle mark to its “key” position, then push the module down.
Don't use brutal force – if you feel strong resistance force, you probably misaligned it.
DON'T FORGET TO POWER OFF YOUR COMPUTER COMPLETELY BEFORE PLUG TPM MODULE INTO MOTHERBOARD!
C.2. Enable TPM 2.0 Options in BIOS
Power on your computer, then enter BIOS setup, and enable TPM 2.0 options. This varies from board to board, since every motherboard model has its own BIOS user interface.
The following instance is the steps for Gigabyte B450M AORUS ELITE:
- Enter BIOS Setup, then switch to Classis Mode (you can't find required options in Easy Mode). Navigate to Peripherals tab, ensure "AMD CPU fTPM" is set to Disabled.
- Enter “Trusted Computing” sub-menu.
- Set “Security Device Support” option to Enabled.
- Navigate to Save & Exit tab, save your changes and reboot your system. All required steps are actually done by now, and next steps are optional, if you want to check TPM module is indeed recognized by BIOS.
- Enter BIOS Setup again, navigate to Peripherals tab. You will find the previously “Trusted Computing” sub-menu is now displayed as “Trusted Computing 2.0”. Select and enter this sub-menu.
- Now you will read the text “TPM20 Device Found”, and information of Controller IC manufacturer (IFX is code for Infineon) and Firmware will be listed below.
- Tip 1: If your motherboard is some-how old, it's a good idea to update the BIOS to latest version. Some old BIOS versions may contains glitches that can cause TPM failure, especially on those motherboard released in 2015.
- Tip 2: Some motherboards need “UEFI Only” boot mode option selected to enable TPM support. If you find TPM options are grayed out, you could try switching boot mode from “CSM Enabled” to “UEFI Only”.
- Tip 3: Many motherboards need enter BIOS setup twice to complete this step. First time, you enable “TPM Support” option, and your MB will not immediately display TPM 2.0 module in selection menu. Just save and exit from BIOS setup, reboot, then enter BIOS setup again. Once you enter BIOS setup the second time, you can choose discrete TPM 2.0 module in TPM option menu. Since TPM device is directly attached to southbridge, usually BIOS (or UEFI) won't do real-time rescanning like USB bus, but just scan once when power-on.
C.3. Inspect TPM 2.0 Module in Windows
Once you enabled your TPM 2.0 module in BIOS setup, you can boot into Windows.
The first Windows booting after TPM module installation will take a bit longer than usual, typically 15 to 30 seconds, depending on your PC. Windows need a few moments to do some TPM related initialization and configuration work. After that, your windows booting time will go back to normal.
Now you can inspect your TPM 2.0 module in Device Manager, to confirm it is properly recognized. Additionally, you can launch TPM Management to get more details.
Inspect in Device Manager
If you are using Windows 10 or Window 11, right-click on Start button, then select “Device Manager” from popup menu.
Alternatively, you could launch Device Manager by pressing ⊞Win + R on keyboard to bring up “Run” window, type in devmgmt.msc, then click “OK”.
In the Device Manager window, find the “Security devices” node. Expand it and you will see the “Trusted Platform Module 2.0” device, which indicates your TPM module is recongnized properly.
Inspect in TPM Management
Press ⊞Win + R on keyboard to bring up “Run” window, type in tpm.msc, then click “OK”. This will launch TPM Management.
In this window you can inspect detailed info (e.g. firmware version), and perform other operations if you need.
NOTE: On some motherboard, under rare circumstance, Windows won't initialized TPM module automatically on first booting. If TPM Management says your TPM module has not been initialized yet, just click “Prepare the TPM...” (first item on the right side panel) to do it manually.
Related Items:
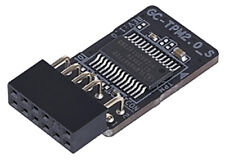
GIGABYTE GC-TPM2.0_S 2.0 TPM Module (12 Pin 12-1) LPC TPM 2.0 Trusted Platform
$49.95
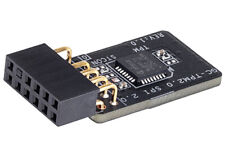
GIGABYTE GC-TPM2.0 SPI 2.0 TPM Module (12 Pin 12-1) SPI TPM 2.0 Trusted Platform
$49.95
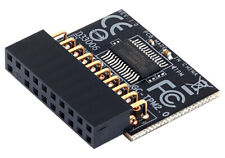
GIGABYTE GC-TPM2.0 TPM Module GC-TPM 2.0 (20 Pin 20-1) Trusted Platform Module
$49.95
![]()
Documentation
- AIX Local Security Checks
- Backdoors
- CentOS Local Security Checks
- CGI abuses
- CISCO
- Databases
- Debian Local Security Checks
- Default Unix Accounts
- Denial of Service
- Fedora Local Security Checks
- Finger abuses
- Firewalls
- FreeBSD Local Security Checks